Selasa, 14 Juni 2016

The Intel 10 Watts Sliding Early 2013

The Intel "10 Watts" Sliding Early 2013 - Laptops and desktops with Intels next-gen processors "Haswell" will be available in the first half of 2013.

It was submitted by Intel CEO Paul Otellini, as quoted by PC World.

Haswell will replace Intel Core i processors Third Generation or "Ivy Bridge" which became available in April of this year.

Intel says, Haswell will carry twice the performance higher than Ivy Bridge, in addition to more power efficient so they can save the battery ultrabook to two times longer.

Matter of more efficient power consumption has been described by Intel in the Intel Developer Forum last September. Haswell has the figures mentioned minimum power consumption by 10 watts, while Ivy Bridge scored 17 watts.

Intel Haswell divided into two famili es: the chip with power consumption of 10 watts dedicated to the combined hybrid ultrabook and tablet, as well as the families of 15 and 17 watt chip intended for laptop and ultrabook.

According to Stacy Smith, Intels Chief Financial Officer, Haswell will reach "qualification for sale" in the first half of 2013. Each chip fabricated through serangkauan Intel internal and external qualification process before it can be produced.

The Intel "10 Watts" Sliding Early 2013
Haswell equipped with new graphics processing unit that supports 4K grap hics so as to display a resolution of 4096 x 3072. Ultrabook driven processor will also support wireless charging capabilities, NFC, voice interaction, and safety are a number of features.

Acer Liquid S1 user guide manual

Acer Liquid S1 user guide manual â€" Acer Liquid S1 was released on August 2013 with DTS Audio enhancement powered and run Android 4.2 Jelly Bean operating sytem. Acer Liquid S1 also available in Dual SIM card slot or called Acer Liquid S1 Duo. The smartphone is pablet category come with big size for smartphone and smaller than tablet. Acer added live screen feature which allows user to annotate photos or screenshots and other preloaded apps such as: Acer print, AcerCloud, float UI and more.


Acer Liquid S1 user guide manual


Acer Liquid S1 equipped with specifications and key features such as: 163 x 83 x 9.6 mm (6.42 x 3.27 x 0.38 in) in dimension with 195 g (6.88 oz) in weight, 5.7 inches TFT capacitive touchscreen display 16 million colors 720 x 1280 pixels screen display with multitouch and float UI, microSD up to 32 GB, 8 GB internal storage, 1 GB of RAM, 8 megapixel rear facing camera with autofocus and LED flash, 2 megapixel front facing camera, run Android 4.2 Jelly Bean operating system, powered by 1.5 GHz quad core MediaTek 6589 processor and Li-Ion 2400 mAH battery.

Acer Liquid S1 rivals and competitors manual:
  • Acer Liquid E2
  • Acer Liquid S2
  • Samsung Galaxy Grand
  • Samsung Galaxy Note 3
  • Sony Xperia C

Acer Liquid S1 user guide manual available to download in pdf file format with 6.3 MB size and contains of 67 pages. The manual provide quick information about the device including setting up, advanced settings, using the smartphone and AcerCloud setup.

Table of contents for Acer Liquid S1 user guide manual:
  • Setting up
  • Using your smartphone
  • Managing contacts
  • Making calls
  • Internet calling
  • Messaging
  • Going online
  • AcerCloud setup
  • Using the Camera
  • < li>Advanced settings
  • Accessories and tips
  • Appendix
  • End User License Agreement
Download Acer Liquid S1 user guide manual here

Guide to Flash or Update Sony Xperia Z5 Premium Using Sony PC Companion

Guide to Flash or Update Sony Xperia Z5 Premium Using Sony PC Companion.

Flash or Update Sony Xperia Z5 Premium. This guide will show you how to flash or Update Sony Xperia Z5 Premium using Sony PC Companion. Sony Xperia Z5 Premium released on 2015, November, This device comes with 5,5 Inches IPS capacitive touchscreen, 16M colors LCD , Run on Android OS, v5.1.1 (Lollipop), upgradable to v6.0 (Marshmallow), and supported with Qualcomm MSM8994 Snapdragon 810 chipset, Quad-core 1.5 GHz Cortex-A53 & Quad-core 2.0 GHz Cortex-A57 CPU, GPU Adreno 430, combined with 3 GB of RAM as their  engine. And you can enj oy exciting 23 MP on main camera, and 5,1 MP on secondary camera.

By using Sony PC Companion you can do the following task below on your Sony Xperia Smartphone.
  1. Change the firmware on your Xperia Device
  2. Remove forgot Password, PIN, Pattern, Screen Lock.
  3. Performing Hard Reset or Factory Reset.
  4. Install the latest firmware.
Please always backup all data stored on your Xperia device. Now following this guide below.
  1. Download the latest Sony PC Companion Here.
  2. To run this software, your PC must meet a minimum requirements.
    • Microsoft® Windows XPâ„¢ SP3 (32 bit),  ;
    • Vista (32/64 bit),Windows 7 (32/64 bit), 
    • Windows 8/8.1 (32/64 bit) or 
    • Windows 10*
    • At least 2 GB of RAM
    • 5 GB of free hard disk space.
    • Intel® Pentium® 4, 3.6 GHz or equivalent AMD processor.
    • Stabil internet connection or Internet broadband connection.
    • One available USB 2.0 or USB 3.0 port and USB cable.
  3. Not password locked phone.
  4. Best tips to flash or update Sony Xperia Z5 Premium
    • Use the original USB cable that came with your device.
    • Connect your device directly to the computer without USB hubs in between.
    • Dont disconnect your device during the update process.
    • Dont connect or disconnect any other USB device during the update process.
    • Dont transfer files between the computer and other USB device during the update process.
    • Dont use or move your device during the update process.
    • Close any program on your computer that youre not currently using.

Guide Flash or Upgrade Sony Xperia Z5 Premium.

  1. Install Sony PC Companion in your computer.
  2. Then launch this program.
    • Actually, From here you can update your firmware, but when you connect the Sony Xperia Z5 Premium, it must be switched on and not in security or password screen.
  3. Then at the support zone click Start.
    flash Sony Xperia Z5 Premium
    flash Sony Xperia Z5 Premium
  4. If this is the first run, PC Companion will download some files.
  5. Once step 2 passed, your window will appear like this picture shown below.
    flash Sony Xperia Z5 Premium
    flash Sony Xperia Z5 Premium
  6. On this window, select Phone / Tablet Software Update. then click Start.
    flash Sony Xperia Z5 Premium
    flash Sony Xperia Z5 Premium
  7. On the pop u p window, select repair my phone/ tablet.
    flash Sony Xperia Z5 Premium
    flash Sony Xperia Z5 Premium
  8. If you using laptop or notebook, Connect your laptop to power supply since the update process
  9. On the next screen, give tick on "I Understand that I need to know....", the n click Next
    flash Sony Xperia Z5 Premium
    flash Sony Xperia Z5 Premium
  10. A warning window appears on screen, that say Data (Contact, Messages, Bookmarks,Calendar events, and setting) stored on Internal storage will be lost. So you must always backup all data and file. When you ready, click Continue.
    flash Sony Xperia Z5 Premium
    flash Sony Xperia Z5 Premium
  11. On the next step, give tick the box and press Next to continue.
  12. Now PC Companion is preparing.
    flash Sony Xperia Z5 Premium
    flash Sony Xperia Z5 Premium
  13. On the next screen, give tick on "I have read and understood ...." then click Continoue.
  14. Then click Next.
  15. Now select phone / tablet model. you can search it on search box by type your phone model (Sony Xperia Z5 Premium)
    flash Sony Xperia Z5 Premium
    flash Sony Xperia Z5 Premium
  16. Then click Next.
  17. Following the instruction step to prepare the phone / tablet for the update.
    flash Sony Xperia Z5 Premium
    flash Sony Xperia Z5 Premium
    • Disconnect the USB cable from your Sony Xperia Z5 Premium device and the computer.
    • Turn Off your device and wait for 5 seconds.
    • Connect the USB cable to the computer.
    • Press and hold the volume down key on your device while connecting the USB cable.
    • Wait until application automatically proc eed to next step.
  18. Once your Sony Xperia Z5 Premium device detected by PC Companion downloading process will start automatically. then upload the new firmware to your Sony Xperia Z5 Premium device.
  19.  When PC Companion finished with update process, disconnect the Sony Xperia Z5 Premium device and switch it on.
  20. Now your Sony Xperia Z5 Premium device is in factory condition, 
  21. The custom data is erased and password protection is removed.
  22. Congratulation, your Sony Xperia Z5 Premium firmware is update now.

Senin, 13 Juni 2016

HTC One V Mobile Ice Cream Sandwich Reviews Specifications

HTC One V, Mobile Ice Cream Sandwich Reviews - Three of the family One Android smartphone, is now a pride of HTC smartphones. One is HTCs flagship smartphone X, targeting upscale segments. While HTC One V, designed to target the middle class segment.

HTC One V has entered the Indonesian market since last April, sold at relatively affordable, yet rich in useful features.

Design & connectivity

HTC One V has a unique shape on the bottom, designed curved like a human chin. His body was wrapped in aluminum material and there is a rubber material in the lower back, as cover SIM card slot and MicroSD card. Rubber material is also used on the back of the place where the camera is.

This smartphone has a dimension of 120.3 x 59.7 x 9.2 mm and weighs 115g, quite comfortable when in the grip. You can grab the whole screen with just one hand.

One V has a 3.7-inch wide-screen landscape covered with scratch-resistant glass Gorilla Glass. Below the display, there are three capacitive buttons back, home, and recent apps. There is a sensation of vibration effects when buttons are touched.

The back of it there is a 5MP camera and LED flash. On the up side, there is a power button and a 3.5 mm audio jack. On the left side there is a MicroUSB port, while the right side is the volume button.

HTC One V
Performance

V One very bright screen, colorful icons and features of t he smartphone application is shown with contrast and sharp. Super LCD2 screen technology, a resolution of 480 x 800 pixels, and a pixel density of 252 pixels per inch.

When in the sun, V One screen can still be viewed comfortably.

Kitchen runway One V reinforced with single-core processor Qualcomm MSM8255 Snapdragon 1 GHz, 512 RAM and Adreno 205 graphics processing unit. From experience KompasTekno, kitchen runway gives the sensation of navigating a fairly smooth, but can not be called satisfactory.

One V have been using the Android operating system 4.0 (Ice Cream Sandwich). This smartphone is able to play the game light and middle class. But when asked to play the games the heavyweights, he feels overwhelmed.

One V available internal memory of 4GB. Users can expand the storage via MicroSD external memory card up to 32GB. HTC also gives bonus data storage media in the cloud (cloud) from Dropbox 25GB free for 2 years.

Aud io quality HTC One V powered by software BeatsAudio, which is claimed to give the sensation of sound more detail and bass elements kick. When the smartphone is placed in the position of the screen facing up, the music comes out sounding more balanced.

Camera

The main camera is a 5MP sensor One V equipped and supported by an LED flash. This camera uses a 28mm lens and aperture 2.0. Unfortunately, HTC does not provide a front camera in One V, so that the smartphone can not be used for video call.

In the camera settings menu, there is a scene camera features, flash, zoom, self-timer, image resolution, video quality, review duration, image adjustments, ISO, white balance, storage, continuous shooting, camera options, video options, camera interface, auto upload, and reset to default.

There is also a function of High Definition Resolution (HDR), macro and p anorama. HTC also provides a variety of effects and filters to enhance your innate photos. If the camera is used to record video at maximum resolution is 720p.

Default application useful

Polaris Office
HTC came with some default application that is useful for users One V. The first Polaris Office is office applications, which could be used to create, open, edit and format documents Word, Excel, and PowerPoint.

Car
HTC provides digital map application and navigation Car in One V. To be able to run this application, you must include an external memory card.

TuneIn Radio
Although available features FM radio, but HTC adds internet radio app TuneIn Radio. In addition to listening to local radio, users can enjoy the V One radio broadcasts in other areas such as Bandung, Yogyakarta, and so on, uses the internet.

Flashlight
Flashlight alter the function of One V be a tool to rch (flashlight), light out of an LED flash next to the main camera.

Dropbox
Media data storage in the cloud (cloud), currently is a trend in the world of computing. HTC does not want to miss that provide cloud services for users One V. 25GB data storage capacity is provided free of charge for 2 years from Dropbox.

Battery life

One V supported by HTC 1500mAh battery capacity, which is installed permanently (can not open pairs). When the battery is 100%, KompasTekno test durability by enabling service GMail, Facebook and Twitter, all of which are used intensively. As a result, the battery capacity of 1500mAh can last for approximately 10 hours.

Please note, the battery life is very dependent on the signal carrier do you use, and how often you access the internet and social networking sites. The battery is also more rapidly depleted if you enable GPS, and Bluetooth.

Conclusion

Excess
  • + Many useful applications built
  • + Affordable
  • + Screen brilliant
Shortage
  • - The main camera is less satisfactory
  • - No front camera
Specifications HTC One V
  • - Single-core processor Qualcomm MSM8255 Snapdragon 1GHz
  • - Unit 205 graphics processor Andreno
  • - 512MB RAM
  • - Operating system Android 4.0 (Ice Cream Sandwich)
  • - 4GB internal memory
  • - The screen is a 3.7-inch 480 x 800 pixel resolution, pixel density of 252 pixels per inch, and display technology Super LCD2
  • - 5MP camera with LED flash, no front camera
  • - Battery 1500mAh
  • - Connectivity GSM SIM card, 3.5 mm audio jack, MicroUSB, MicroSD, 3G, HSPA, GPS, Wi-Fi, Bluetooth
  • - Dimensions 120.3 x 59.7 x 9.2 mm
  • - Weight 115 grams
  • - Price, you can look on google

Free Voltage for Android Download

Voltage game is a game for Android, agame was previously a paid app, but now you can downlaod it for free from Android Market. This game is similar to Tetris game but with a more modern version.

Heres a video demo of the game for Android Voltage:
Modern Tetris Game Voltage can be used on Android OS 2.2 or later. Immediately free download here

Tutorial Cara Root LG L20 D105 Menggunakan SuperRoot apk

[Tutorial] Cara Root LG L20 D105 menggunakan SuperRoot.apk


Kali ini kita akan mencoba mengutak-atik atau istilah kerenya adalah melakukan root pada LG L20. Sekedar informasi saja bahwa jika anda melakukan root maka anda akan bertindak selaku superuser, sehingga anda dapat melakukan beberapa hal yang belum bisa dilakukan saat belum dalam keadaan root. Smartphone Android keluaran produsen asal korea LG yaitu LG L20. bekerja pada sistem android Kit kat 4.4.2, dan prosesor prosesor 1 GHz Dual Core Cortex-A7 sebagai dapur pacunya.

Dengan melakukan rooting pada perangkat android maka anda telah membuat Sistem Operasi Android Anda mempunyai hak akses root. Root merupakan suatu user yang mempunyai izin atau permisi untuk melakukan manipulasi file yang lebih banyak dan bebas daripada user biasa. Jika Anda pernah menggunakan sistem operasi komputer berbasis linux tentunya Anda pasti akan menemui satu user root (super user) yang bertindak sebagai ‘Administrator’ dari sistem tersebut.

Pada Setting default, Sistem Operasi Android yang ada di smartphone pada umumnya tidak mempunyai user sebagai root, karena vendor-vendor smartphone memang tidak menyarankan untuk melakukan rooting pada produk smartphone. Adapun keuntunganya adalah sebagai berikut ;
Root Android LG L20 D105

  1.  Bisa menghapus aplikasi yang di-install di memori internal.
  2.  Bisa menggunakan sistem operasi yang dapat dikustomisasi.
  3.  Bisa mengubah konfigur asi manual hardware pada smartphone Android Anda.
  4.  Lebih fleksibel dan leluasa dalam pengaturan penyimpanan data di memori.
Ok... Anda tentunya sudah memahami keuntungan dan kerugian dalam melakukan proses root pada perangkat anda.

Langkah Root LG L20 D105.

  1. Pastikan Baterai terisi minimal 50-70% daya
  2. Backup semua data penting anda
  3. Aktifkan pada menu untuk dapat menginstall dari Unknown Source, dengan cara mengarahkan ke Menu>>Settings>>Security 

  4. Download Super Root.apk untuk LG L20 dari link ini
  5. Sambungkan LG L20 anda dengan komputer PC menggunakan USB Kabel
  6. Copy Super Root.apk ke root kartu SD Anda.
  7. Setelah file tersebut telah di copy, lepaskan perangkat Anda dari PC Anda
  8. Buka aplikasi File Manager pada perangkat Anda dan menginstal aplikasi yang telah Anda copy tadi ke perangkat Anda.
  9. Setelah aplikasi sudah terinstal, jalankan aplikasi Super-root
  10. Pilih Install SuperSU dari menu dropdown pertama yang muncul
  11. Pilih exploit
  12. Aplikasi akan melakukan root pada perangkat anda, tunggu beberapa saat sampai proses benar selesai.
  13. Reboot perangkat anda setelah proses root selesai
  14. Selesai.

HTC One SV User Manual Guide

HTC One SV User Manual Guide Pdf - HTC One SV is the latest smartphone from HTC, after rumors circulating a few months ago. HTC launched the HTC family finally this one. HTC One SV will be available in January 2013 last month, and the first country that would become targeted Singapore and Australia. It is said that this latest Smartphone, Smartphone blend - previous smartphone was first introduced. HTC ie V S and HTC, but HTC One SV get some new features. One of them, the HTC One SV supports 4G LTE network and can use the internet at high speed.

This smartphone uses super LCD-2 screen measuring 4.3 inches with a resolution of 480 x 800. Screens used by HTC One SV have a higher density of up to 221 dpi. In addition, the touch screen is protected by Gorilla glass 2.

Besides, in terms of connectivity the phone is equipped with 3 audio jacks. 5 mm, bluetooth 4. 0, wifi and NFC, like other phones made ​​by HTC, the phone is then supported with beats audio features and no less for this camera is equipped with a 5 megapixel camera with aperture speed of f / 2. 0 which is at the back of a moment for the camera equipped with camera 1. 6 megapixel camera that can act as a video call.

As the kitchen spur, SV HTC uses Qualcomm Snapdragon S4 plus 1.2 ghz dual-core. generally like the other HTC smartphones, one sv also been equipped with beats audio product. as the operating system, htc android one sv using version 4. 1, commonly known by the code name of jelly bean.
Source: Download HTC One SV User Manual Guide Pdf

Microsoft Lumia 640 XL Pc Suite and Usb Driver for Windows

Microsoft Lumia 640 XL Pc Suite and Usb Driver for Windows

Could you look for in a mobile Usb drivers, here provides a Usb driver free download and how to install to Microsoft Lumia 640 XL. Make sure you have the appropriate type of model phone before downloading the driver to the computer. Driver Usb support following type model for Microsoft Lumia 640 XL Usb Driver, Modem, Com port. Without delay, please download the following. Download Microsoft Lumia 640 XL Pc Suite and Usb Driver for Windows
Microsoft Lumia 640 XL Pc Suite and Usb Driver for Windows

Microsoft Lumia 640 XL Pc Suite and Usb Driver Installation Tutorial :

  • You should know that if  Microsoft Lumia 640 XL smartphone is powered by a corresponding MTK processor, here is explained how to install the Usb drivers for the model of this type.
  • Run and use as an administrator if you are Microsoft Lumia 640 XL Usb drivers work very precisely and correctly.

Feel free to skip this step if the mobile device is not supported by Mtk Cpu :

  1. Enable USB debugging on Microsoft Lumia 640 XL to do that, please go to Settings> Developer Options.
  2. Download the driver to the computers usb driver Extract files using WinZip or WinRAR, find the fi le "PdaNetA4150.exe" and start note (Be sure to close all programs). 
  3. Select the Type phone model (Microsoft Lumia 640 XL Smartphone), Please select press / click the install button.
  4. Now you just connect Microsoft Lumia 640 XL, there will be a popup message saying your phone is connected. Congratulations you have completed the installation.
Well, thats a brief explanation neighbor how to download and step by step how to install Microsoft Lumia 640 XL Pc Suite and Usb Driver for Windows, and uses his good luck.

LG G Flex D959 user guide manual

LG G Flex D959 user guide manual â€" LG G Flex D959 for T-Mobile was released on January 2014 and it was the first curved phone. T-Mobile offers G Flex with SIM starter kit tha will added automatically to new customer order. T-Mobile G Flex performs with Android 4.2.2 Jelly Bean operating support and 6.0 inches curved POLED for high quality display and minimize glare from reflections. G Flex D959 for T-Mobile also support for 4G LTE network for great experience on internet ability for the carrier customers.


LG G Flex D959 user guide manual


LG G Flex D959 for T-Mobile equipped with specifications and key features such as: 160.5 x 81.6 x 8.7 mm (6.32 x 3.21 x 0.34 inches) in dimension with 177 g (6.24 oz) in weight, 6.0 inches Curved HD OLED touchscreen display 16 million colors 1280 x 720 pixels screen display with multitouch, 32 GB internal storage, 2 GB of RAM, 13 megapixel rear facing camera with autofocus and LED flash, 2.1 megapixel front facing camera, run Android 4.2.2 Jelly Bean operating system, powered by 2.26 GHz quad core processor Qualcomm Snapdragon 800 MSM8974 Adreno 330 and Li-Po 3500 mAH battery with up to 9.4 hours of talk time.

LG G Fl ex D959 rivals and competitors manual:
  • HTC One
  • HTC One Max
  • LG G Flex LS995
  • LG G2
  • Nokia Lumia 1520
LG G Flex D959 user guide manual available to download in pdf file with 4.2 MB size and contaiins of 172 pages. LG G Flex D959 manual pdf wil l helps T-Mobile customers with important information such as: service activation of the smartphone, touch screen tips, unlock the screen, viewfinder knowledge, streaming online and how to play or save music and video to the phone.

Table of contents for LG G Flex D959 user manual:
  • Service activation
  • Important notice
  • Getting to know your phone
  • Your home screen
  • Google account setup
  • Calls
  • Contacts
  • Messaging/email
  • Social networking
  • Camera
  • Camcorder
  • Multimedia
  • Utilities
  • The web
  • Settings
  • LG On-Screen phone
  • LG PC Suite
  • Phone software update
  • Trademarks
  • Accessories
  • Troubleshooting
  • For your safety
Read LG G Flex user manual here

Download LG G Flex user manual guide here

Minggu, 12 Juni 2016

Huawei Ascend G330 user manual pdf


Huawei Ascend G330 user manual pdf â€" Huawei Ascend G330 was released on October 2012 with no flex appeared on its chassis. Huawei Ascend G330 is upgradable from G300 series and become mid range phone but sale on low end price. As a budget phone, Huawei Ascend G330 performance support by good battery life.


Huawei Ascend G330 user manual pdf


Huawei Ascend G330 equipped with specifications and key features such as: 122.5 x 62.6 x 11.2 mm in dimension with 130 g in weight, 4.0 inch TFT capacitive touchscreen display 480 x 800 pixels resolution display 16 million colors with multitouch support, microSD up to 32 GB, 4 GB internal storagr with 2.5 Gb for user available, 512 MB of RAM, 5 megapixel rear facing camera with autofocus and LED flash, VGA front facing camera, Android 4.0 Ice Cream Sandwich operating system, powered by 1 GHz dual core Qualcomm MSM8225Snapdragon Adreno 203, Li-Ion 1500 mAH battery, stand-by time up to 350 hours and talk time up to 5 hours.

Huawei As cend G330 user manual pdf is available to download in 11.38 MB size with contains of 68 pages that introduced the Android phone, knowledge base and setting for safe and efficient start your phone. The user manual guide of Huawei Ascend G330 in Managing your Mobile phone will give you tips on how to setting the date and time, display, ringers and setting phone services.   

Table of contents for Huawei Ascend G330 user manual pdf:

  • Read before proceeding
  • Getting started
  • Calling
  • People
  • Text input
  • Messaging
  • Getting connected
  • Email
  • Entertainment
  • Google Services
  • Synchronizing information
  • Using other applications
  • Managing your mobile phone
  • Appendix

For owners of Huawei Ascend G330, here we give you direct link download of Huawei Ascend G330 user manual pdf from official Huawei website below:

Download Huawei Ascend G330 user manual pdf here

HTC DROID DNA Ready to Present Globally with Name Deluxe

HTC DROID DNA: Ready to Present Globally with Name Deluxe - HTC Droid DNA officially introduced a few days ago in the United States, after months ago introduced in Japan by the name of A Butterfly. Now HTC is rumored to be soon officially introduce international versions 5 inch phablet this.

Outside the United States and Japan, HTC will release the code phablet 5 inch Deluxe. Just as DNA and A Butterfly Droid, HTC Deluxe will come with a touch screen measuring 5 inches with a resolution of 1920 x 1080piksel FullHD.

The design is al so the same as the Deluxe HTC Droid DNA and A Butterfly as seen in the image above.

Unfortunately there is no information on when HTC will officially introduce this international Standard. And to specifications HTC Droid Deluxe similar to DNA and A Butterfly, but it is unlikely to come with support for 4G networks.

Iphone 6 Review

Iphone 6 Review

For a variety of reasons, from the camera to the app ecosystem to the hardware itself, the iPhone 6 is one of the best smartphones on the market. Maybe even the best. But it’s still an iPhone. The same thing Apple’s been making for seven years. A fantastically good iPhone, but an iPhone through and through.

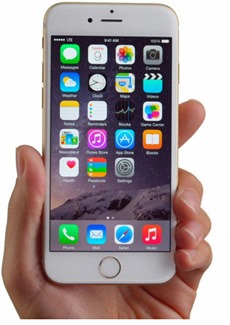
Well, with the Apple iPhone 6 were looking at one of the thinnest and sleekest handsets in the market – still. Its got a strong combination of metal back (which feels exceptionally premium, borrowing bucketloads of design language from the iPad Air) and the way the screen curves into the chassis gives it a slight lozenge feel.

That 8Mp sensor doesnt sound like much, and Apple is right when it says we shouldnt worry. Fact is, the iPhone 6 takes excellent photos. While the iPhone 6 lacks the optical stabilisation of the 6 Plus, its still capable of sharp and detailed images with great exposure and accurate colours. If it had an optical zoom, it could almost replace a dedicated camera. Whats important is that youll have a great camera on you all the time if you buy an iPhone 6. Plus, the good news is that Olloclips lenses are now available for the iPhone 6, which brings wide-angle, fisheye and two macro lenses in one package.

Apple couldn’t go too big on the iPhone (probably why it released two) because if it had a lot of its core users would have been pretty pissed; a switch from 4in to 5.5in is definitely a bridge to far for those who only just found out what a phablet is. For reference, the iPhone 6’s display is the exact same size as the one aboard the Nexus 5, HTC One, Samsung Galaxy Alpha and Moto X – again, all perfectly proportioned handsets. 

The other big design change is to the power button, which has now been moved to the right-hand side of the phone. This makes a lot of sense and, given the phone is now a larger device at 138.1 x 67 x 6.9mm, hitting the top of the handset is a much harder task, so moving the button is the right thing to do.

Last year, iOS 7 was truly innovative. It had a new look, new features, new ideas about how we’d all use smartphones. A lot of those ideas were great, a lot of them were bad, and the whole OS felt chaotic as a result. This year, Apple presents refinement in the form of iOS 8.

Add those three things together, and this phone on my desk isn’t at all surprising. It’s the iPhone 6: a bigger, brighter, badder iPhone designed to appeal to the customers for whom the iPhone 5S and its 4-inch screen now seem adorably antiquated. (Which is basically everybody.) It starts at $199 on a two-year contract and comes in silver, gold, and space gray. It’s full of new technology and crafted from a new mold. Apple intends for it to be the new standard in a new type of smartphone, to be the big-screen phone that anyone can handle. Not the first big phone, but the best. The big phone for everyone.

Like the rest of the exterior buttons, the power key is raised and easy to hit in both left and right hand modes. Its metallic, and crucially doesnt have the same rattle that I criticised on the iPhone 5S.

The iPhone 6’s battery is one of the primary beneficiaries of both this relentless tweaking — and the addition of some new hardware real estate. The phone can easily last me a day and a half, from one morning to the next afternoon, no matter how much I use it. I still charge it almost every night, but at least I’m not forced to baby the battery just to get it through dinner anymore.

Theres a good argument that adding more pixels would just drain the battery faster and give the CPU more work to do. In fact, only using the screen resolution thats required is something thats becoming more popular, as you can see from the 720p Samsung Galaxy Alpha.

With a bigger screen, some design changes have had to be made. The most obvious one is that the power button is no longer on the top but has been relocated to the upper right-hand side. This makes it much easier to reach with a finger or thumb, even more so than with the iPhone 6 Plus.

The iPhone 6 is among the fastest phones around. It comes equipped with the A8 64-bit dual-core processor, which Apple claims delivers a 25 percent boost in speed and a 50 percent graphics boost over the iPhone 5S; this claim was confirmed in both our benchmark test s (see below) and hands-on testing. Navigating the UI and launching apps is zippy, and the phone runs nearly all tasks at a silky-smooth clip.

In many ways weve reached peak smartphone, in that we know a flagship phone from a major manufacturer is likely to be a top performer. We all like to compare, of course, but a few benchmark points here and there tend not to make much difference in the real world. This is important because Apple has - as ever - deliberately obfuscated the spec of its latest handset. Not for Apple Samsungs boasting about octacore processors and multiple megs of RAM. Apple likes to boast about odd specs such as 64-bit and Retina displays, but it tends to avoid getting into hardware arms races. The iPhone 6 is no exception.

The rest of the iPhone 6 is very similar to the iPhone 5S, with the speakers at the bottom flanking the Lightning port. Well, I say speakers: its just the one speaker, but thanks to the slightly elongate d bottom of the phone you wont cover it when holding the phone in landscape orientation.

So what’s changed? The glass front is now curved and the corners are more rounded than before, which results in a softer in-hand experience. Flip the phone over and you have two antenna bands on the back and that “controversial” protruding camera sensor, which A LOT of people seem very annoyed about. Personally, neither of these things bothered me all that much – they’re just there. I don’t think they add or take anything away from the overall dynamic of the handset.

It’s simply and cleanly designed, with a metal back that curves cleanly around the sides. There are few seams and no ugly clutter. The only real flaw is the antenna design: Apple opted to essentially outline the top and bottom of the phone’s back with small plastic stripes where wireless radios can transmit signal. It just looks bad, like so meone drew on my phone with a marker. HTC’s simple, striped design on the One M8 is far better, and even Apple’s glass-strip-on-the-top-and-bottom approach for the 5S looked nicer.

Even with a slightly larger screen, the iPhone remains comfortable to hold. With fast performance, a great display, an elegant new design and a much-needed software update, its one of the best smartphones you can buy right now. We wish it had the same long battery life as the iPhone 6 Plus (not to mention its optical image stabilization) but even then, the iPhone 6 is still the better choice for most people.

Guide How To Enter USB Debugging Mode For Android 5 0 Lollipop

Guide How To Enter USB Debugging Mode For Android 5.0 Lollipop.


Enter USB Debugging Mode For Android 5.0 Lollipop. If you are Android user, especially for expert user you must know what is the USB Debugging mode on your Android devices. And you can not avoid this mode when you use your android smartphone. We must know that main function of this USB Debugging Mode is used for bridge between your android smartphone device and computer or PC with Android SDK (software Development Kit). You can enable this USB Debugging mode when your android device connecting to the computer directly using original USB Cable.

Some people may find other name besides USB Debugging Mode on different version of Android versions. which this mode is called Developer Mode. So with the simple explain above I think you ha ve knew what is the simple meaning of USB Debugging, Now, you can understand that USB Debugging Mode is used to establishes a direct connection between an Android Device and a computer and readies it for deeper-level actions.

Now, the question is what is USB Debugging for ? As in the brief description above, now, we can decide when we need to use USB Debugging Mode on our Android devices. Usually USB Debugging is used for :
  1. Copy and paste data or file from Android device to your PC and conversely. 
  2. Install android SDK (software Development Kit) when you want root your android devices
  3. Then Flash ROM your Android devices, and many other functions.
  4. Read Log Data that stored in your devices.
  5. And many other functions.
Before you perform the action how to Enter US B Debugging Mode For Android 5.0 Lollipop. you must ensure to know what is your android version on your devices. you can follow this guide how to check your android version :

Check Your Android Version Via Handheld.

You can check your Android version directly from your Android devices, you can check it by tap Setting > then find About Devices/About Phone > now you will see your Android version.

Tap Setting
First step : Tap Setting

Tap About Devices
Second Step : Tap About Devices

find android version
Third Step : find android version

Enter USB Debugging Mode For Android 5.0 Lollipop.

After you know what is your android version, now you can perform to Enter USB Debugging Mode on your Android Devices, All android version has any various way to enter USB Debugging mode, and n ow I will show to you how to enter USB Download Mode on Android 5.0 Lollipop. Follow this guide how to do it :
  1. Turn On your devices
    enter usb debugging android 5.0 lollipop
    enter usb debugging android 5.0 lollipop
  2. Go to settings
    enter usb debugging android 5.0 lollipop
    enter usb debugging android 5.0 lollipop
  3. Tap About Phone
    enter usb debugging android 5.0 lollipop
    enter usb debugging android 5.0 lollipop
  4. Then Tap Build Number.
    enter usb debugging android 5   .0 lollipop
    enter usb debugging android 5.0 lollipop
  5. When you find Build Number, Tap it 7 times to become developer.
  6. Then back to Settings
    enter usb debugging android 5.0 lollipop
    enter usb debugging android 5.0 lollipop
  7. Tap Developer Options
    enter usb debugging android 5.0 lollipop
    enter usb debugging android 5.0 lollipop
  8. Then give tick on USB Debugging.

    enter usb debugging android 5.0 lollipop
    enter usb debugging android 5.0 lollipop
  9. When dialogue box is appear like picture bellow, you can tap OK
    enter usb debugging android 5.0 lollipop
    enter usb debugging android 5.0 lollipop

Finish, now your android smartphone is on USB Debugging Mode or Developer Option.

Guide To Unlock Bootloader On Sony Xperia Z2 Official Method

Guide To Unlock Bootloader On Sony Xperia Z2 [Official Method].

Unlock Bootloader On Sony Xperia Z2. On this article We will share to you how to unlock bootloader on sony xperia device, excatly on Sony Xperia Z2 device. We can Unlock bootloader on this device use this guide. By unlocking bootloader on the xperia device its possible to install new custom ROM on Sony xperia device. But, you need to know that unlock bootloader is not recomended task for a standar user, because its not needed for normal usage. But now, sony has released great software experiences through their rigorously tested and official software releases. You must be familiar with the risks involved if not, you should not proceed further to unlock bootloader on sony xperia devices.

By unlocking your sony xpe ria device you may void the warranty of your Sony Xperia Z2 devices. You should be aware to be responsibility to all risk, and We does not guarantee the full functionality, or to all risk for any unsigned custom ROM being flashed to your Sony Xperia Z2 device after the boot loader is unlocked.

Make sure your device is Sony Xperia Z2 to follow this instruction guide. Your Sony Xperia Z2 is the smartphone smartphone released on February, 2014. with 5,2 Inchi wide IIPS LCD capacitive touchscreen, 16M colors, work on Android OS, v4.4.2 (KitKat), v5.0.2 (Lollipop), planned upgrade to v6.0 (Marshmallow) and supported with chipset Qualcomm MSM8974AB Snapdragon 801, Processor Quad-core 2.3 GHz Krait 400, GPU Adreno 330, combined with 3 GB of RAM, 20,7 MP on primary camera and 2,2 MP on secondary camera.

Make sure your device is possible to unlock the boot loader using this guide, following the steps below to using service menu on your device :

  1. Open dialer on your Sony Xperia Z2 device
  2. Now enter *#*#7378423#*#* to access service menu.
    dial *#*#7378423#*#*
    dial *#*#7378423#*#*
  3. Tap Service info
    Service info - Sony Xperia Z2
    Service info - Sony Xperia Z2
  4. Tap Configuration
    Configuration - Sony Xperia Z2
    Configuration - Sony Xperia Z2
  5. On Rooting Status, Bootloader unlock allowed should says Yes
  6. Bootloader unlock allowed - sony xperia Z2
    Bootloader unlock allowed - sony xperia Z2

Now, read the instruction guide below carefully to unlock bootloader on Sony Xperia Z2 devices.

Unlock Bootloader On Sony Xperia Z2.

Before you proceed to unlock bootloader, please make sure you do a complete back-up of the system. Because unlock bootloader will force your device to factory reset or hard reset, this cause erase or delete or wipe your personal data account, file stored, and app installed on phone internal memory.  Th e factory reset will return the Sony Xperia Z2 device to the factory original condition. In addition, if you have enabled My Xperia, this function must be turned off before you can unlock your device. This is guide step by step :
  1. You must enable Developer Option on this devices, how to do it ?
    • Go to Settings
    • Tap About phone
    • Then on Build number  tap seven (7) times to enable developer options.
  2. Enable OEM Unlocking.
    • Go to Settings, 
    • Go into Developer options and enable OEM unlocking.
  3. Then, Visit sonymobile developer website, Here
  4. Scroll down this site, until you find the picture shown below.
    Unlock Bootloader On Sony Xperia Z2
    Unlock Bootloader On Sony Xperia Z2
  5. Now select your xperia device on dropdown menu, right here you must select Sony Xperia Z2.
    Unlock Bootloader On Sony Xperia Z2
    Unlock Bootloader On Sony Xperia Z2
  6. And then click continue.
  7. Now enter your valid Email Addres to get email verivications.
    Unlock Bootloader On Sony Xperia Z2
  8. Make sure to check term and conditions.
  9. Now, Go to inbox at your email account to proceed, and you will see email like this 
    Unlock Bootloader On Sony Xperia Z2
  10. To proceed unlocking your bootloader, just click text link : click here to proceed.
  11. Now, Enter your IMEI, IDID or MEID number your Sony Xperia Z2 at the form. 
    1. To view the IMEI number, you can also open the phone dialer on your device and enter *#06#.
      Enter IMEI - Unlock Bootloader On Sony Xperia Z2
  12. And then click Submit
  13. If you enter right IMEI, you will get your Unlock Code, this same like this picture.

    Install the Android SDK and the device drivers.

    When you get Unlock Code, now you must install android SDK on your computer, follow the next step here:
    1. Download and install android SDK, here
    2. If you using windows computer, you need to download and isntall fastboot driver, Here
    3. For OSX or linux, you are not required to install any additional drivers.
    4. Then on your Sony Xperia Z2 device, turn on USB debugging by :
      • Go to Settings > 
      • Developer options and 
      • Tap to enable USB debugging.

    Connect Sony Xperia Z2 To Fastboot.

    1. Turn Off your Sony Xperia Z2 device.
    2. Then connect a USB-cable to your computer.
    3. On your Sony Xperia Z2, press the Volume up button at the same time as you connect the other end of the USB-cable.
    Unlock code - Unlock Bootloader On Sony Xperia Z2
    fastboot - Unlock Bootloader On Sony Xperia Z2
    fastboot - Unlock Bootloader On Sony Xperia Z2
    < div class="separator" style="clear: both; text-align: center;">
  • For Windows users, when asked for a driver, point to the usb_driver folder where you placed the android_winusb.inf-file, and select the Android Boot loader Interface-file.
  • When your device is connected, open a command window on your computer and go to the platform-tools folder within the Android SDK folder.
  • Now, Enter the following command:
    • fastboot devices
  • Make sure you have not any error message on this step.
  • Enter Unlock Code.

    1. This very crucial step for Sony Xperia Z2 warranty.
    2. So,  If you still want to unlock the boot loader of your device, you can enter the following command :
      • fastboot -i 0x0fce oem unlock 0x077C1E5A36F8AEC9
    3. Which the bold number is your unlock cod e.
    4. And, once again make sure there is no error message on your computer screen.
    5. Done, You have now unlocked the boot loader of your Sony Xperia Z2 device

    Sabtu, 11 Juni 2016

    How to Transfer Contacts from iPhone 4S to Samsung Note 5


    How to Transfer iPhone 4S Contacts to Samsung Note 5

    Nowadays, it becomes more and more popular that people have two phones, especially for those people who are in business. They carry Samsung mobile phone for work and iPhone for their relatives and close friends. However, how to transfer contacts between iPhone 4S and Samsung Galaxy Note 5? It is no doubt that Mobile Transfer can do this f or you in a simple way.


    Thinking about changing your phone from iPhone 4/4s/5c/5/5s to Samsung Galaxy Note 5? Transfer iPhone contact to Note 5, Then you must be in need of a tool to transfer contacts from iPhone 4S to Samsung Note 5. Search the internet, and you will find most of the methods provided are involved with Gmail. That is, you have to sync the phone numbers and then use your account to remove them to Samsung. Yet, it may not seem easy enough if you finish reading this guide. All that you want to prepare are two USB cables, a computer and Mobile Transfer.

    Honestly, Mobile Transfer is professional phone data transfer software not only in transferring contacts but also in copying text messages, apps, photos, music and more between multiple phones run Android, Symbian and iOS.


    How to Transfer iPhone 4S Contacts to Samsung Note 5:

    Step 1. Install and launch Mobile Transfer on computer

    Launch the Mobile Transfer after downloading and installing it on your computer. When you see the home window as below, choose Phone to Phone Transfer to continue.


    Step 2. Connect Samsung Galaxy Note 5 and iPhone 4/4S/5 to the PC

    See the picture below. It tells you to plug the two phones into the USB ports. And when you have done so, the devices will be automatically detected.


    Step 3. Transfer contacts between Samsung and iPhone

    After you mark the data you want to transfer, like contacts, photos or other data, click the "Start Copy" button to allow the program transfer data from Samsung to iPhone, or from iPhone to Samsung. When its done, click "OK".


    -------------------------------------------------------------------------------------------------------------------------------------------------------------


    More related articles

    Copy Contacts from iPhone 4S to Samsung A5

    Can I Transfer Data from Galaxy S2/S3 to iPhone 6S?

    How to Transfer Contacts from old Samsung to Note 5